







Codex + Elementor MCP becomes especially useful when you know what you want to change, why it matters, and how the result should work. A clear brief gives AI something concrete to implement and gives you something concrete to verify.
We recently applied this approach to our own WordPress website. We cleaned up the categories and tags across Blog and Academy, reassigned the content, aligned the listing and category/tag archive designs, and built custom AJAX filters with skeleton loading states.
Here is the workflow you can reuse on an existing Elementor website.
What Codex + Elementor MCP Does
Codex is the coding agent; Elementor MCP is a connection that exposes supported Elementor actions to it. MCP stands for Model Context Protocol. It lets a compatible AI client work with the tools offered by a connected server.
Elementor’s official MCP can expose page structures, native elements, global styles, and template operations. The available actions depend on your installed version, supported elements, and WordPress permissions. Always inspect those capabilities before planning edits.
Our project also needed WordPress content management and custom PHP, CSS, and JavaScript. These are separate parts of the workflow. An Elementor connection should not be assumed to provide unrestricted taxonomy, file, or database access.
For the wider context, see our experience beta testing Elementor MCP with Codex and Claude.
1. Start with a Specific Brief
“Improve our Academy” leaves too many decisions open. Before making changes, define the content types, classification rules, design reference, and expected interactions.
In our case, Blog uses standard WordPress posts, while Academy is a custom post type. Both use categories and tags, but each listing needs to show its own content.
A useful starting prompt looks like this:
Audit all Blog posts and Academy guides.
Propose a consistent category and tag structure.
Use categories for the main subject and tags for specific tools or techniques.
Show the proposed assignments before changing them.
Identify shared taxonomies, affected templates, existing archive URLs, and any content outside this scope.
Define “done” at the beginning. For us, that meant useful classifications, consistent cards and spacing, filters that return the correct content, and a layout that works on mobile.
2. Connect Codex and Inspect the Site
If you have not connected the tools yet, follow the current Elementor MCP setup guide. In WordPress, open Elementor → Elementor MCP, enable access, choose Codex, and follow the generated connection instructions. The setup creates an application password; keep those connection details private.
OpenAI also documents MCP configuration for Codex. Once connected, begin with a read-only inspection: confirm the site, list the available tools, and inspect the relevant templates and styles.
Before bulk edits, export the content assignments and templates and make sure you have a restorable backup. Test changes on staging where available.
💡 Tip: Ask the agent to identify anything it cannot edit through the connected tools. This avoids planning a workflow around capabilities the site does not expose.
3. Clean Up Categories and Tags Before Building Filters
A filter is only as useful as the classification behind it. If a plugin name appears as both a category and a tag, or similar subjects use several different labels, visitors have to understand your internal history to find a guide.
We used a simple distinction:
- Category: the main problem the article helps solve, such as Analytics & Tracking or Multilingual Websites.
- Tags: the tools and techniques involved, such as Elementor, WPML, or Google Tag Manager.
For example, our guide on preventing WPML from breaking custom HTML belongs in Multilingual Websites, with Elementor, HTML, and WPML as tags.
We reviewed and reassigned all 24 published Academy guides during the cleanup. The same classification principle was applied to Blog posts.
- Export the current terms and assignments.
- Review a proposed article-by-article mapping.
- Apply the approved mapping in manageable batches.
- Compare the saved assignments against the mapping.
- Check drafts and other post types before removing unused terms.
WordPress taxonomies can be shared with other content types. An apparently unused category in Academy may still matter elsewhere. If a public archive URL changes or disappears, decide whether it needs a redirect before removing it.
4. Give Blog and Academy a Consistent Design
Once the content structure is clear, define which existing layout should be the reference. Match the card image ratio, typography, spacing, category labels, buttons, and responsive columns across Blog and Academy. Apply the same visual rules to category and tag archive templates.
Consistency does not mean identical queries. The Blog listing must show posts; Academy must show guides. A category or tag archive must retain its current term context.
Use the existing Blog and Academy design as the reference.
Align the card styling, filter controls, spacing, and responsive behavior across the listings and taxonomy archives.
Preserve each template’s content query and keep the layout editable in Elementor.
Inspect the existing template structure before making changes.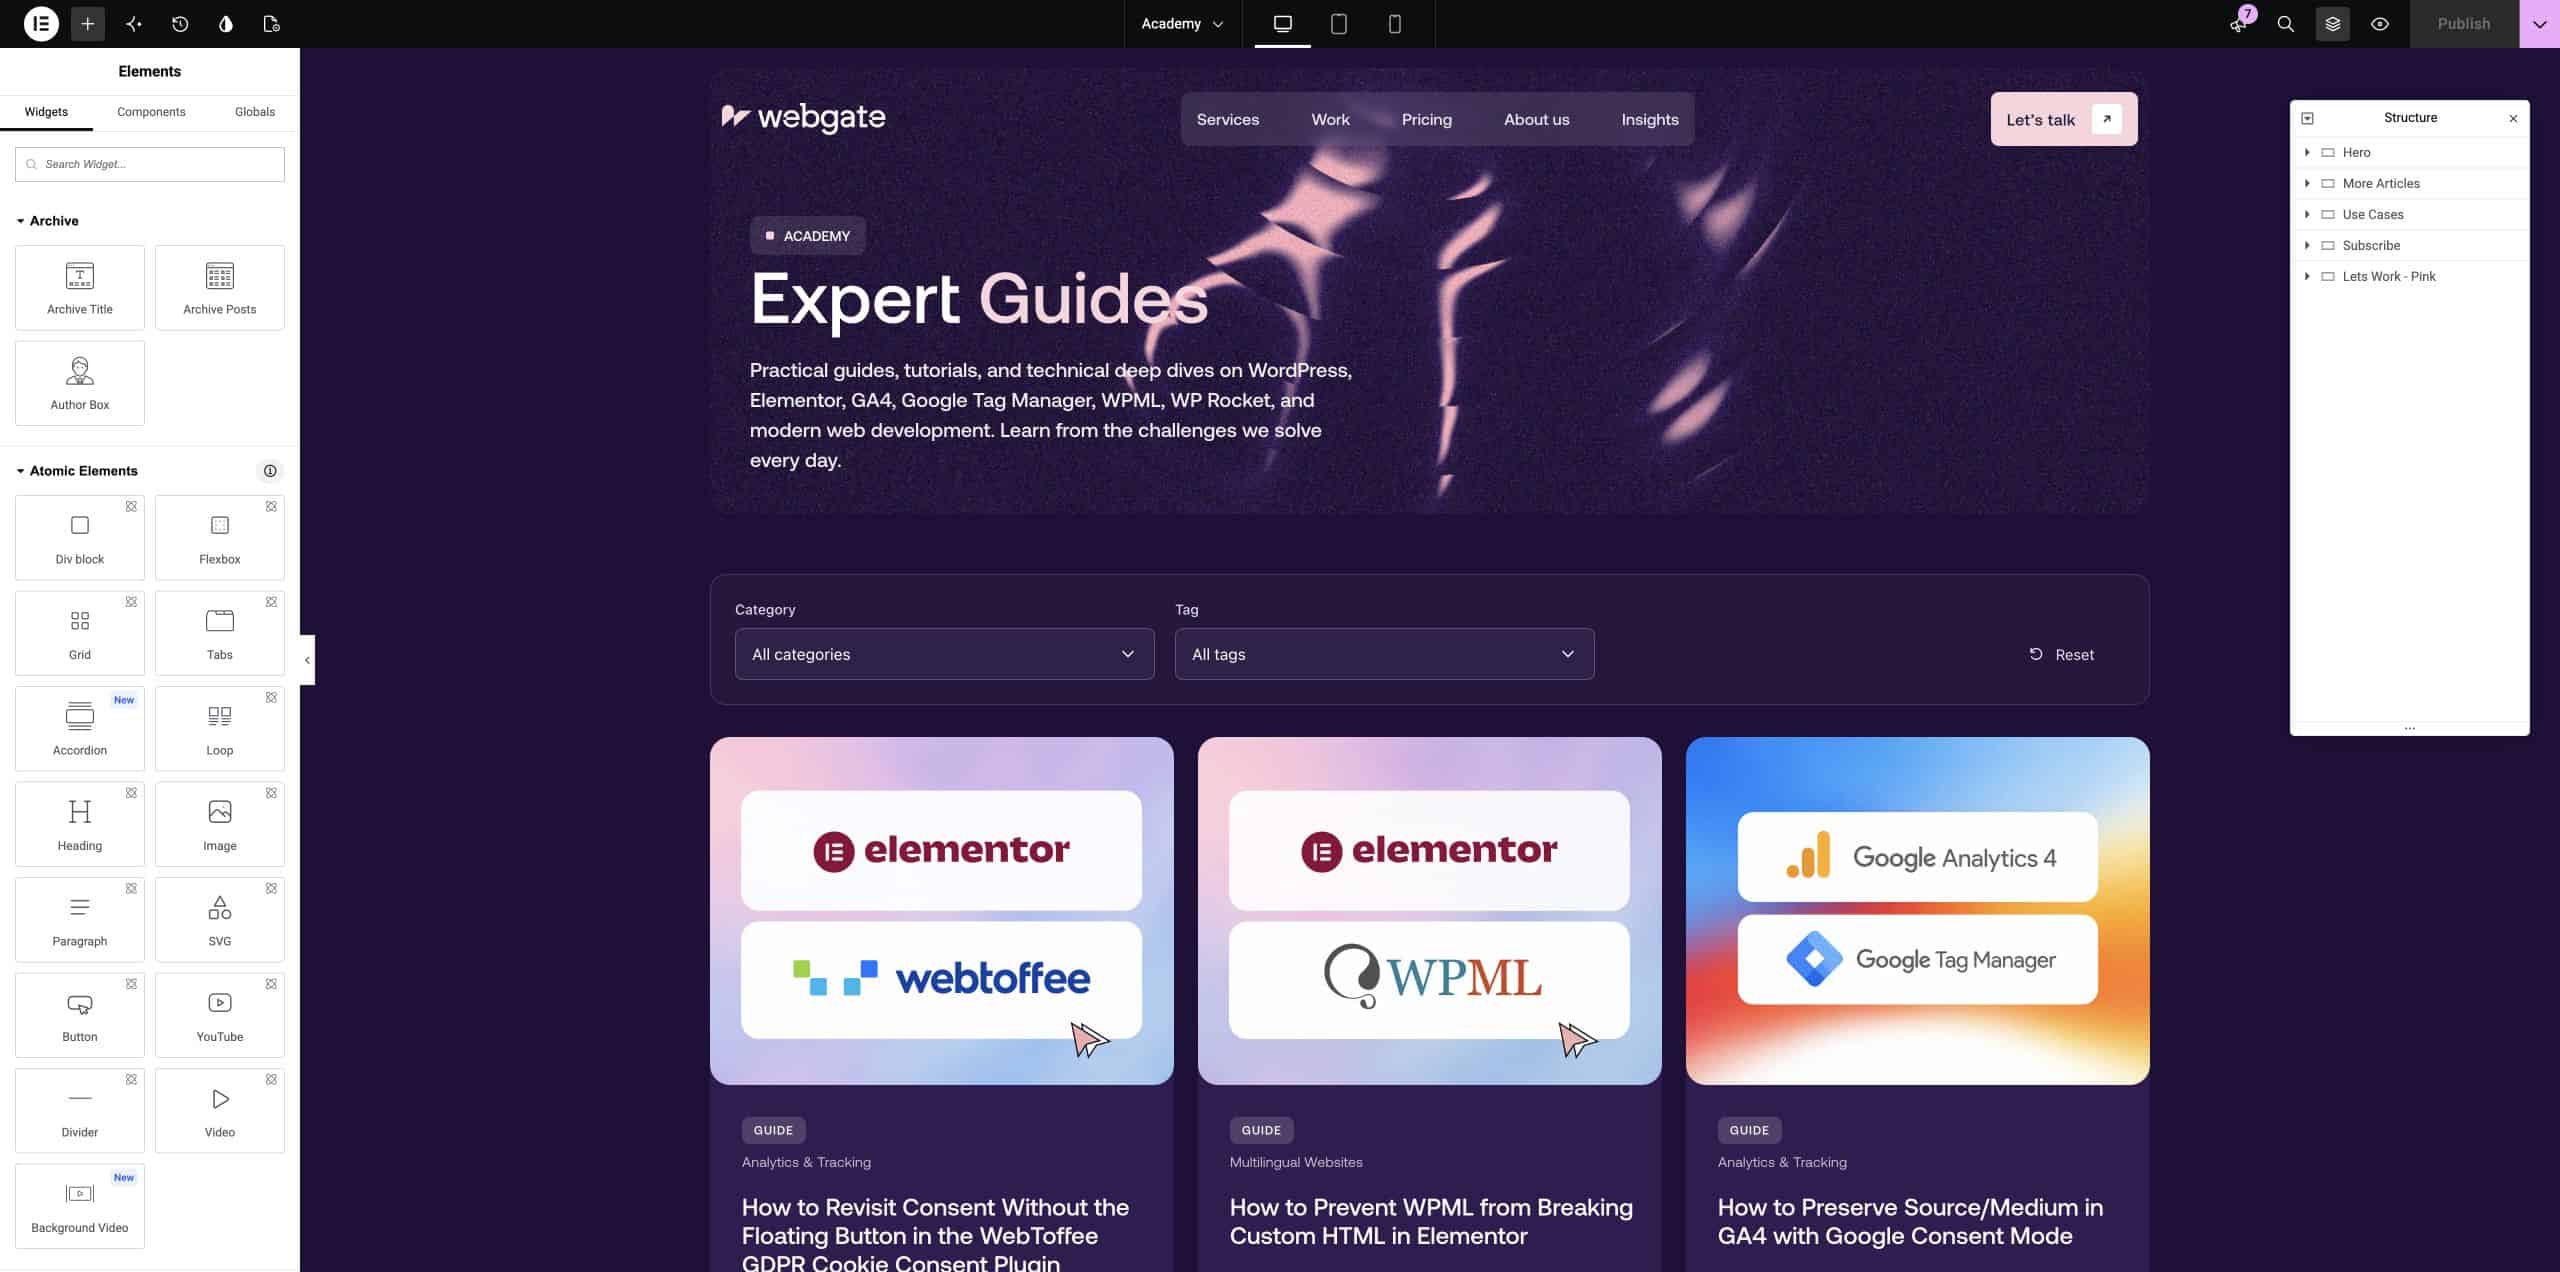
In our implementation, the Elementor layouts and custom archive/filter code worked together. Keeping the visual structure editable matters: future content and design changes should remain understandable to the team.
5. Create Category and Tag Archive Templates with Elementor MCP
The next part is easy to overlook: what happens when someone clicks a category or tag on an article? That link opens a WordPress taxonomy archive. It needs a proper template too, otherwise visitors can leave your carefully designed Blog or Academy and land on a page with a different layout.
With Elementor Pro, use a Theme Builder Archive template for these URLs. You do not need to create a separate WordPress page for every category or tag. One dynamic template can serve multiple terms.
Elementor MCP supports Theme Builder documents and display conditions. Ask Codex to inspect the existing site parts and available archive elements before creating anything.
- Inspect existing conditions. Find out whether an archive template already covers categories or tags. Reuse or adjust it where appropriate to avoid overlapping templates.
- Create the Archive site part. Give it a clear name, such as “Category & Tag Archive”, and reuse the Blog/Academy card design, global styles, and responsive spacing.
- Use dynamic archive content. Show the current term’s title and description, with a results element that inherits the current archive query. Do not hard-code one category or replace the query with “all posts”.
- Define the content types. Our categories and tags are shared by Blog and Academy. Decide whether an archive should show both together or in separate sections. Separate sections must each keep the current term constraint while querying the intended post type.
- Assign category and tag conditions. Target category archives and tag archives explicitly. Avoid a broad “All Archives” condition unless you also intend to cover author, date, and other archives.
- Preview real terms, then apply. Check one category and one tag, including pagination and a term with few results. Publish the template and activate its conditions only after reviewing the result.
Here is a prompt you can adapt:
Using Elementor MCP, inspect the existing Theme Builder archive templates and their display conditions.
Create or update an Archive template for category and tag URLs, matching our Blog and Academy design.
Use dynamic archive titles and descriptions.
Preserve the current category or tag in every results query.
Our taxonomy is shared: show Blog posts and Academy guides in separate sections, each limited to the current term and its own post type.
Reuse the existing card design and global styles.
Include pagination, empty states, and mobile layouts.
Prepare conditions for category archives and tag archives only.
Report conflicts with existing conditions.
Preview a real category and a real tag before publishing.
If the connected tools cannot configure a required element or query, explain what needs a separate WordPress change.
You can inspect the result in Elementor → Theme Builder → Archive. Elementor’s archive template guide and display-condition guide explain the corresponding editor controls.
💡 Tip: A template can look correct in the editor while displaying the wrong articles. Verify the actual category/tag URLs and their content, not just the preview layout.
6. Specify AJAX Filter Behavior, Including Loading States
“Add category and tag filters” is only the starting point. The details determine whether the interface feels complete.
Our filters support multiple selections. Choices within one group use OR; category and tag groups combine with AND. For example, two selected categories plus the WP Rocket tag means: articles in either category that also have that tag.
We also added linked filter options, removable selection chips, a reset action, and URL parameters so a filtered view can be reopened or shared.
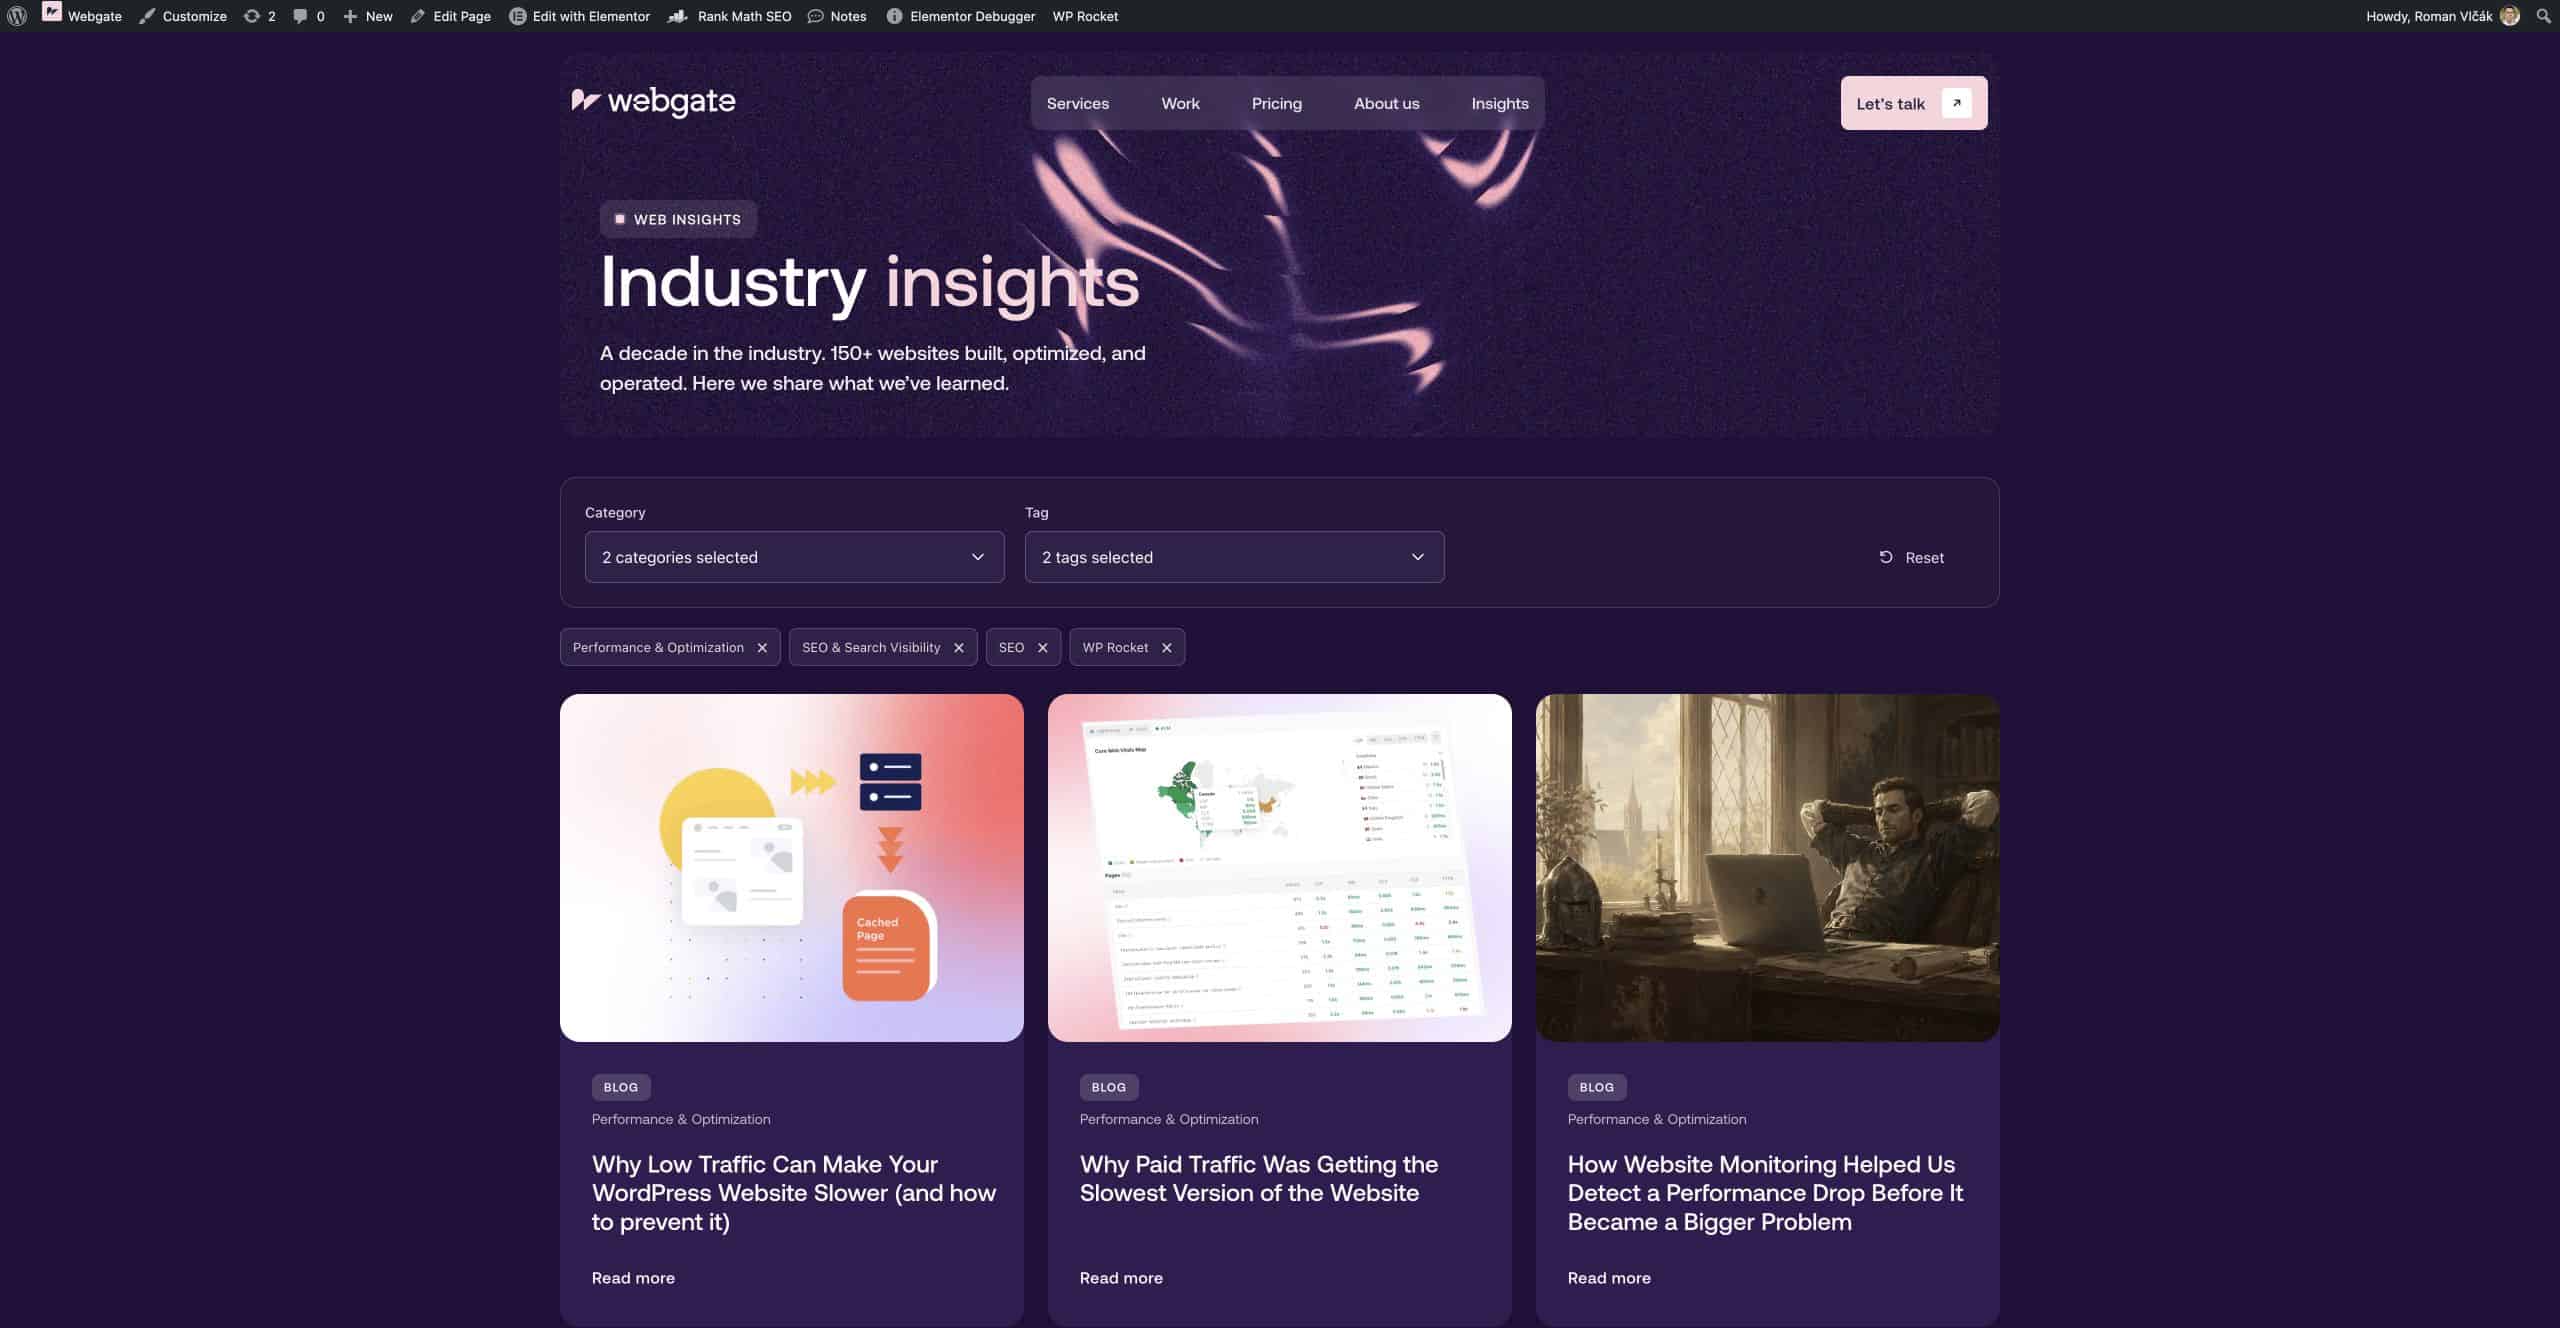
The AJAX request updates the result grid without reloading the whole page. While results load, skeleton cards show the shape of the incoming content.
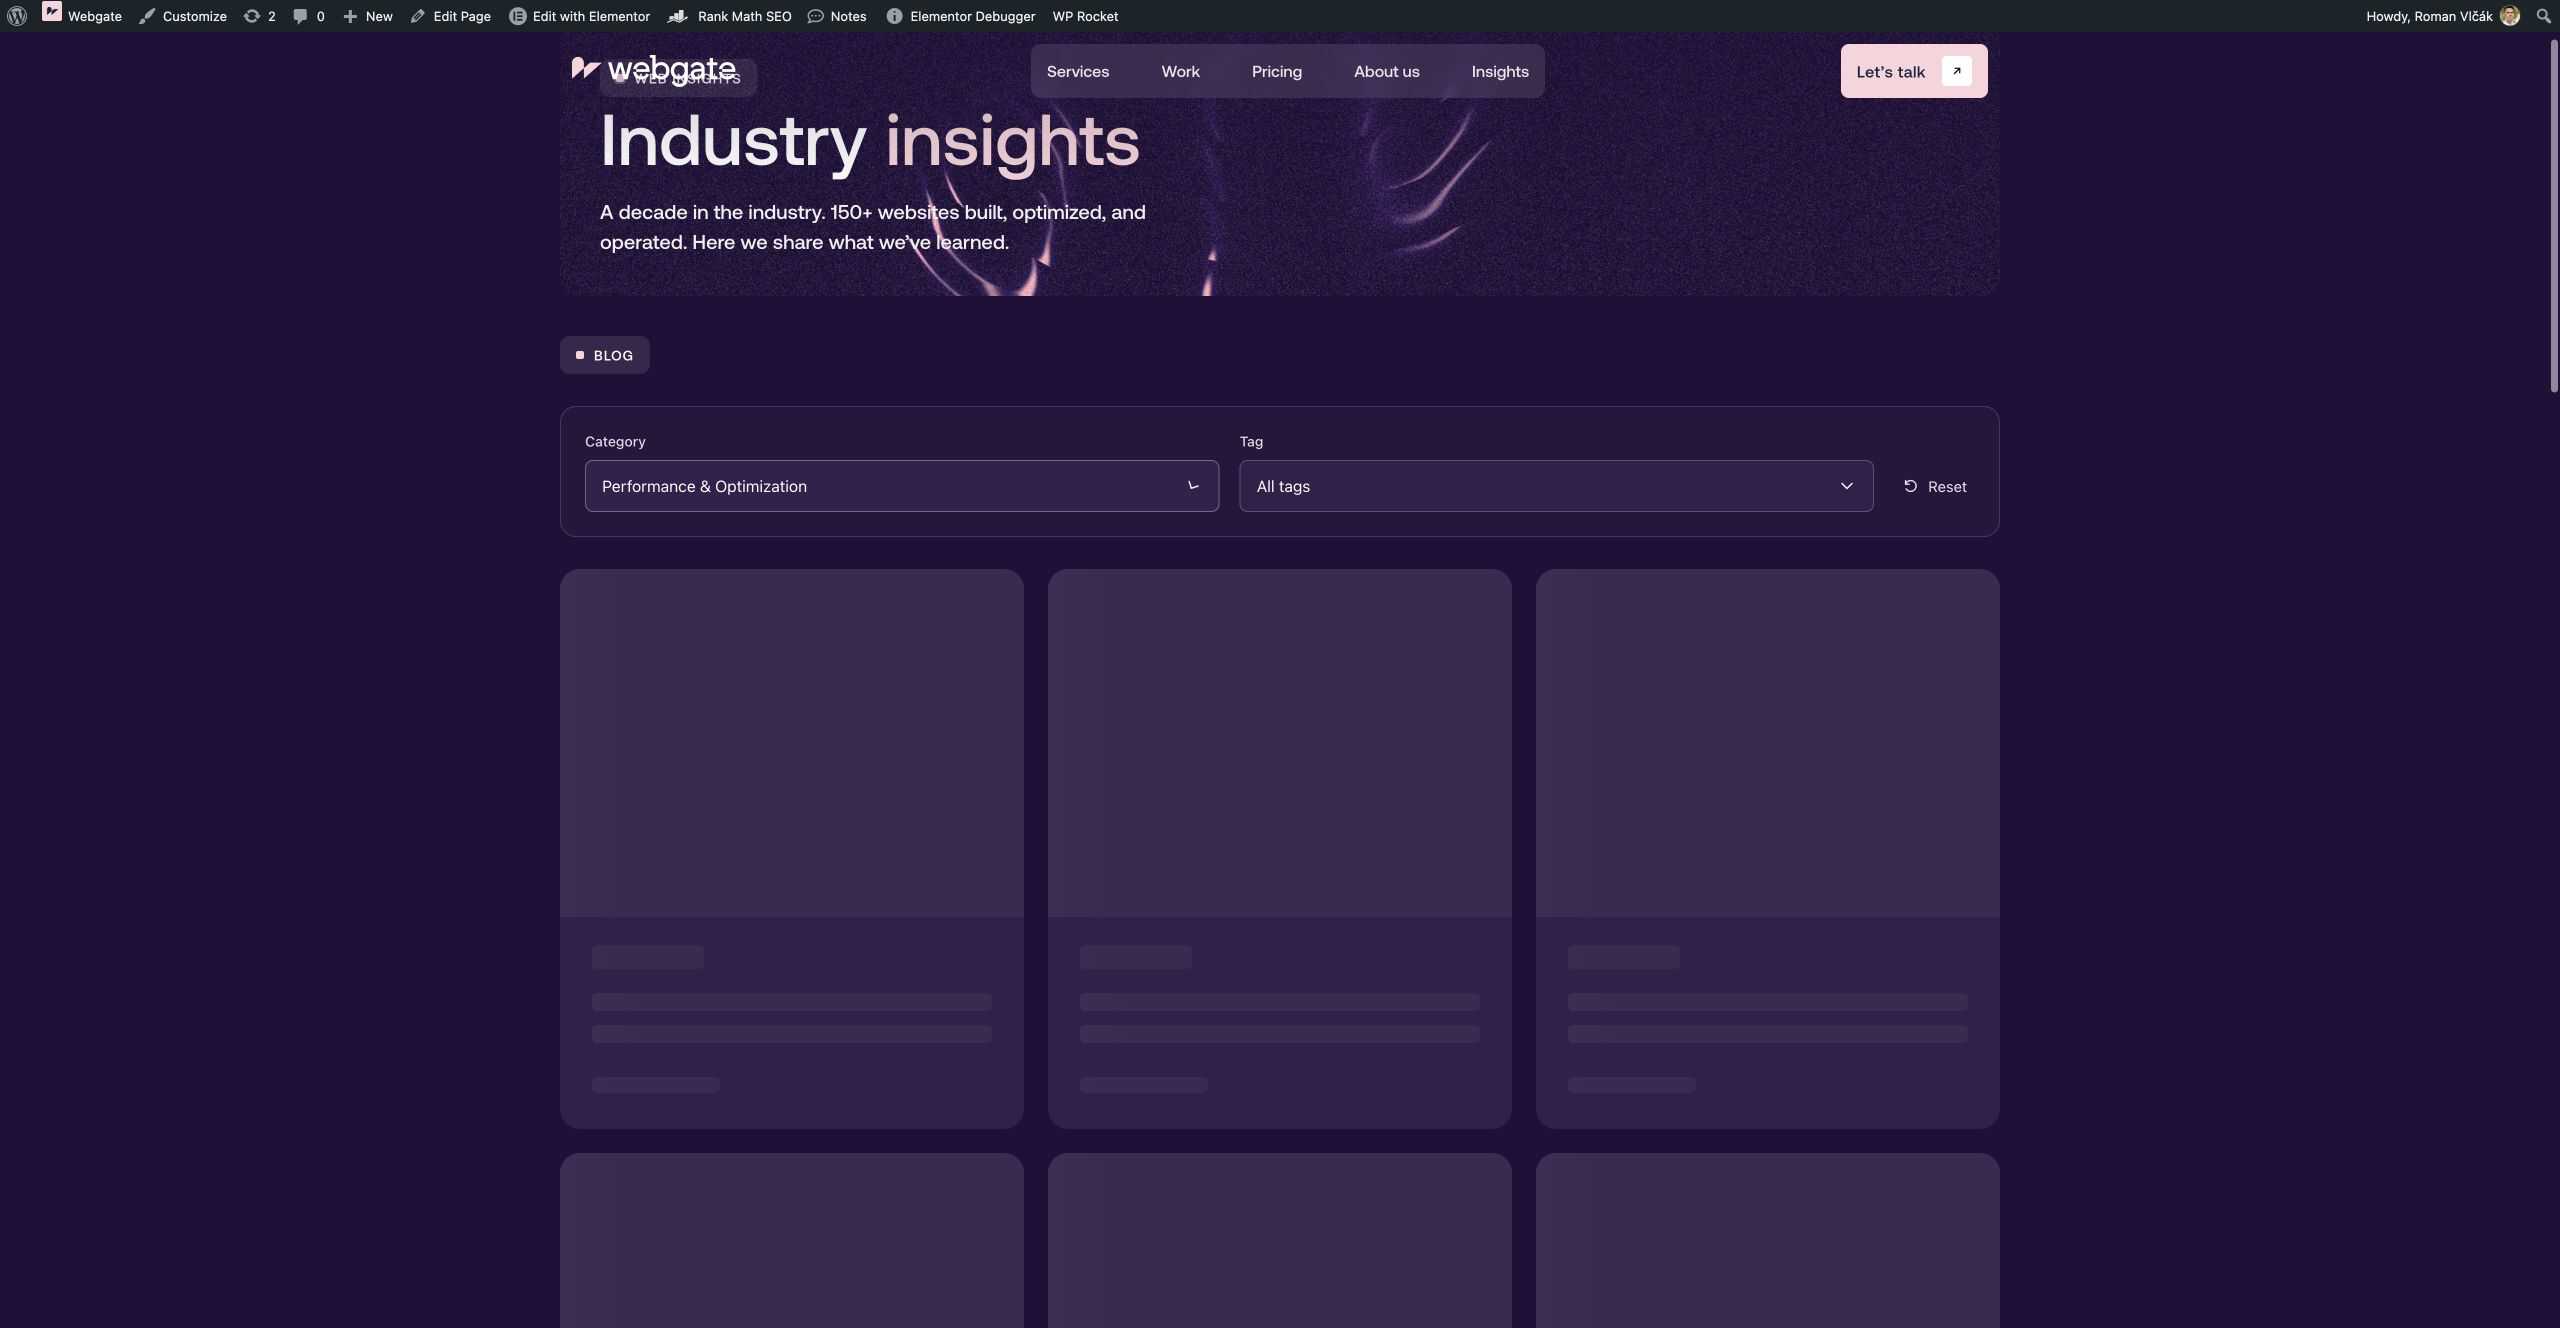
Use a brief that covers the full interaction:
Add multi-select category and tag filters to the main result grid.
Use OR within each filter and AND between filters.
Update results without a full page reload.
Show skeleton cards while loading, preserve selections in the URL, and restore them with browser Back and Forward.
Include removable chips, Reset, an empty state, and an error/retry state.
Prevent an older request from replacing newer results.
Keep unrelated featured and recommended content unchanged.
Our implementation used custom PHP for the WordPress query, JavaScript for requests and state, and CSS for controls and skeletons. Codex helped with that implementation work; Elementor provided the surrounding page and template structure.
A skeleton is loading feedback, not proof of a faster server. Its purpose is to make the waiting state understandable and avoid a blank grid.
7. Verify the Result as a Visitor
A successful save in WordPress does not prove that the website works. Test the frontend, including a logged-out view with the site’s normal caching and optimization settings.
- Content: compare filtered results against known category and tag assignments.
- Interactions: select multiple options, remove chips, clear one filter, and reset everything.
- Navigation: open a filtered URL directly and use Back and Forward.
- Requests: change filters quickly, test slow loading, and check failure recovery.
- Accessibility: use the keyboard and verify focus, selected states, and loading announcements.
- Layout: inspect narrow mobile screens, tablet, and desktop.
- Archives: open category and tag links and confirm the correct heading, content, and design.
Our verification included multi-select query checks, browser history, chip removal, and phone widths of 320 and 390 pixels. Those checks made the brief measurable.
Optimization can also change interaction timing. Our guide to a WP Rocket-compatible Elementor mobile menu explains a related example of why first-interaction testing matters.
Why “Knowing What” Makes AI More Effective
The reusable part of this workflow is the decision-making: define the classification, choose a design reference, describe the interaction states, and set acceptance checks. Codex can then help execute a series of specific changes and respond to precise feedback.
For our website, that produced a cleaner content structure, consistent archive designs, and filters with loading feedback and shareable selections. The practical benefit was reducing repetitive implementation while keeping the result tied to clear requirements.
The better you can describe and evaluate the outcome, the more useful Codex + Elementor MCP becomes.
Frequently Asked Questions
Can Elementor MCP handle the entire WordPress cleanup?
Do not assume so. Elementor MCP exposes supported Elementor operations. Taxonomy changes and custom filtering may require separate WordPress tools, authorized admin access, or code changes. Check the capabilities available on your site first.
Do you need development knowledge to use this workflow?
You need enough knowledge to define the expected behavior and judge the output. For custom PHP queries and AJAX interactions, a developer should review and test the implementation.
Does AJAX filtering replace category and tag archives?
No. Filters help visitors narrow a listing; archive URLs still need the correct template, content, and SEO settings. Review both as part of the same content system.